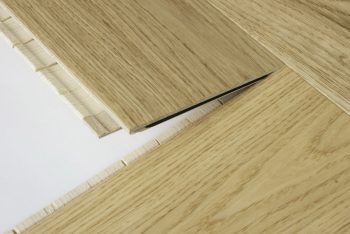
INNOVATIVE OPTILOCK JOINT
CLASSIC HERRINGBONE FLOATING INSTALLATION
The New Optilock™ joint, dedicated to classic herringbone products, was created to improve the installation of the timeless herringbone pattern. Thanks to its intuitive installation, you can install the new The Optilock™ classic floor yourself in your interior, without glue or professional tools.
OPTILOCK ENSURES: :
- Quick glue-free installation
- Up to 50% shorter installation time compared to traditional glue installation
- No need to put the right and left board together – simple and intuitive floor laying
- “Clean installation” without glue residues
- Compared to the instalation of a classic herringbone with right and left-handed boards, there is half of the material waste
Note- Optilock™ classic herringbone products cannot be used or installed together with the previous version of flooring.
INSTALLATION VIDEO
Floor installation procedure step by step:
1.
Before installation use a putty knife to remove any residues from the substrate. Vacuum or sweep the surface.
2.
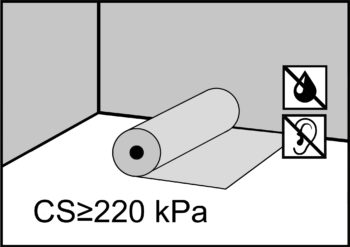
For floating installation, high-density mineral underlays with CS≥220 kPa (static load) should be used. Divide the room in half and mark the line dividing the room into two halves. Start installing the boards.
3.
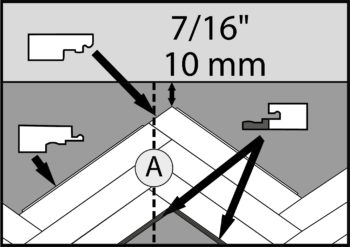
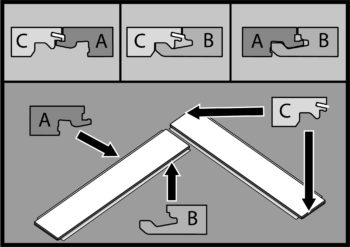
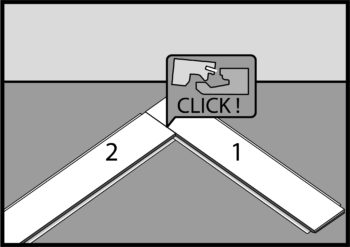
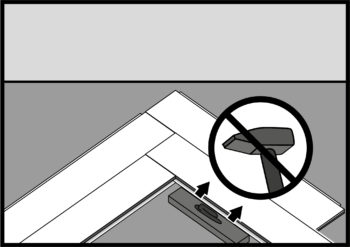
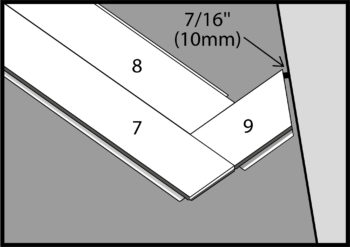
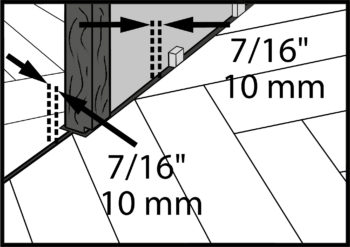
When installing, make sure that the grooves of the boards are facing in the direction of the herringbone arrangement. Remember about the 7/16” (10 mm) wall expansion joint
4.
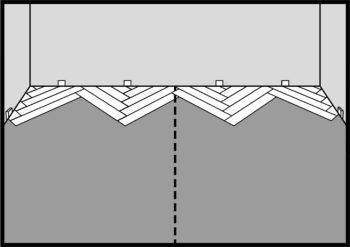
Place the boards symmetrically to the walls.
5.
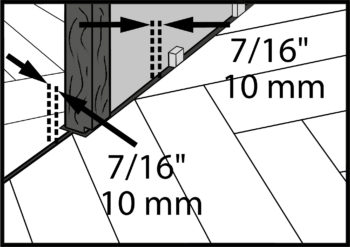
Remember about the 7/16” (10 mm) wall and door expansion joint.
6.
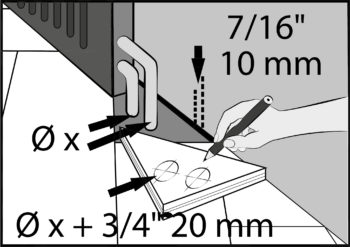
In case of pipes or other obstacles, cut out holes with a diameter increased by 3/4” (20mm).
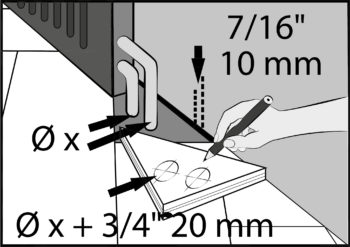
7.
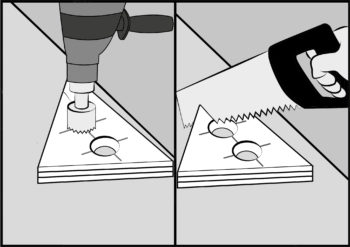
Cut the holes and then cut with the saw along the line as shown in the figure.
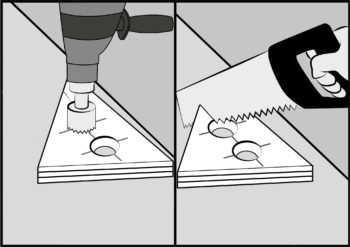
8.
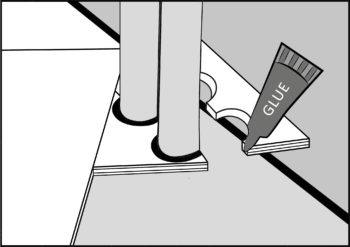
Glue the cut spot using waterproof adhesive. Water-based adhesive cannot be used.
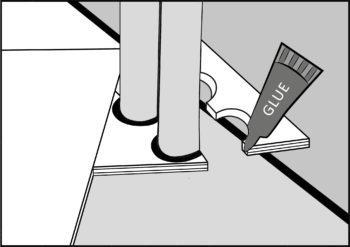
9.
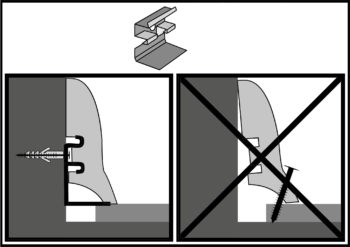
Install the skirting/trim boards only to the wall, never to the floor! Remove all expansion wedges before starting the installation of skirting boards.
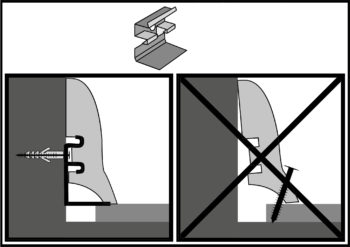
10.
Once the skirting/trim boards have been installed, the floor is ready for use.
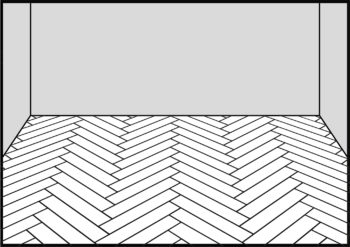
Floor installation step by step procedure for the classic herringbone
1.
Before installation use a putty knife to remove any residues from the substrate. Vacuum or sweep the surface. Divide the room in half and mark the line dividing the room into two halves. Start installing the boards without using glue.
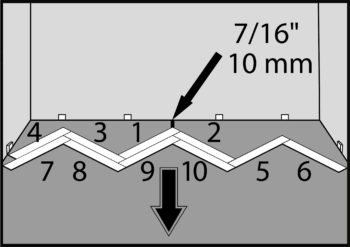
2.
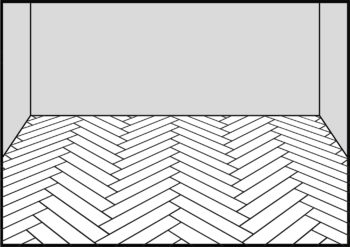
When installing, make sure that the grooves of the boards are facing in the direction of the herringbone arrangement. Remember about the 7/16” (10 mm) wall expansion joint.
3.
Place the boards symmetrically to the walls.
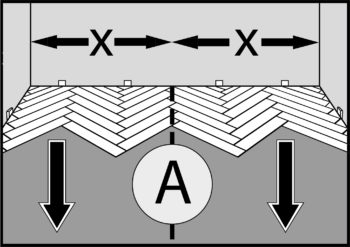
4.
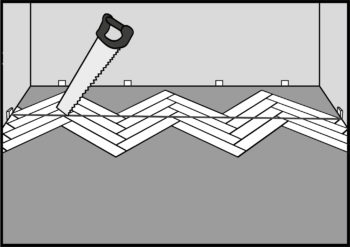
After installing at least three rows of boards, draw a line parallel to the wall as shown in the figure.
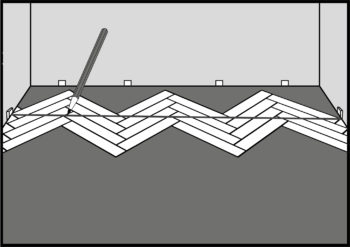
5.
After having marked the line, remove the boards and cut them along the mark. Mark and remember the order of lines laid and crossed on the boards.
6.
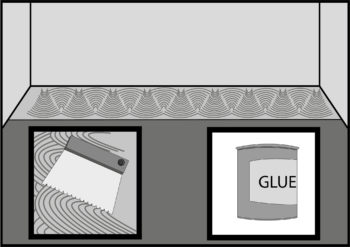
Apply the glue on the substrate in the width of the cut-off strip of boards. Apply the glue following the instructions of the glue manufacturer.
7.
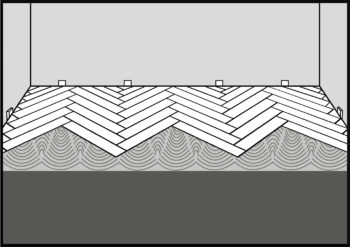
Apply it to a small area of the substrate so that the boards can be installed in time. Water-based adhesives can not be used.
8.
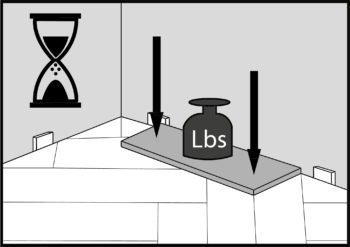
The boards which are glued down to the surfaces have to be weighted while the glue is drying, using for example the packs with the floor.
IMPORTANT: during the installation, all the boards have to be glued on the frontal locks using waterproof adhesives.
9.
Remember about the 7/16” (10 mm) wall and door expansion joint.
10.
In case of pipes or other obstacles, cut out holes with a diameter increased by 3/4” (20 mm).
11.
Place the boards symmetrically to the walls

Cut the holes and then cut with the saw along the line as shown in the figure.
12.
Glue the cut spot using waterproof adhesive. Water-based adhesive cannot be used.
13.
Install the skirting/trim boards only to the wall, never to the floor! Remove all expansion wedges before starting the installation of skirting boards.
14.
Once the skirting/trim boards have been installed, the floor is ready for use.
15.
KITCHEN CABINETRY
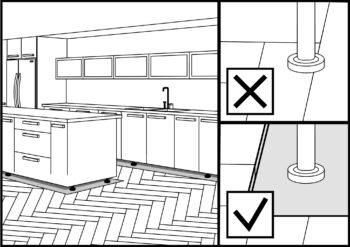
Floating installation of the herringbone under the kitchen cabinetry is possible in two options: when making expansion gaps in the floor in the places of the kitchen cabinet legs, cut a hole under the cabinet leg or make a linear expansion gap under the kitchen plinth.
After the proper procedure under the cabinetry is completed, continue floating installation in the open area.
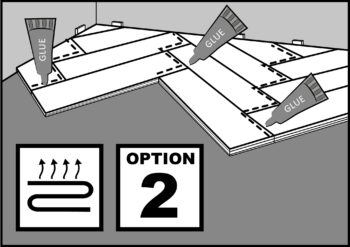
IMPORTANT: In case of installation in the floating system, all edges, which, due to their shape, cannot support themselves, should be joined with D3-classwaterproof wood adhesive. (e.g. cutting boards in room corners, at the floor connection with ceramic tiles, stairs, walls, columns). Do not use water-based adhesives. When attempting to lift the board you are installing, make sure the joint is properly locked. If necessary, you can gently tap the board from the top. For more information on floor maintenance and installation visit barlinek.com.
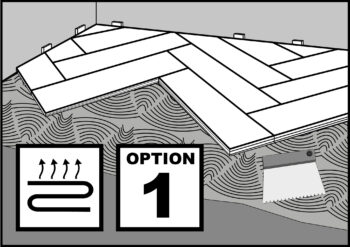
Installation in the temporarily heated rooms, installation in the places with large fluctuations of temperature and humidity during the year, installation in the temporarily unused rooms (e.g. investments) – the classic herringbone should be then glued to the surface or installed floating by gluing the short edges with D3 glue.
